This is a contributions post for my synoptic project. Here I plan to document everything I worked on and completed as part of this project, including any documents, in engine work and everything else. I wanted to do this since I haven’t been as vigilant in posting updates on my blog as I wanted to be, so I plan to cover everything here to make sure I show off everything I have done. Me and my team haven’t had the easiest time with this project, so I also wanted to discuss why and how things could have been changed.
To start off, I first want to talk about this project as a whole and how it has took shape over the course of working on it. When me and my teammates (Samuel Kenny, Ben Knowlson, Callum Robinson and Luke Collier) first received the pitch idea back, we were told it would be an combination of both my pitched idea and Ben’s idea. At first me and my team struggled with coming up with a way to link and use these two separate idea’s and make them one cohesive game idea. This did affect us at the beginning of the project as we didn’t have a clear idea or starting point to help us start our pre-production as early as we wanted to. Eventually we ended up with an idea that was unlike both my and Ben’s pitches, shown off in this ideas document I set up in our teams chat. While i was on board with the idea to begin with, I feel like after looking back on the project that this initial idea wasn’t the best we could have come up with and lead to some complications later down the line. However, after finalising the idea with my team we set out to complete the pre-production for the project, which I explained here.
After completing pre-production for the project, I feel like my team fell apart in terms of motivation and drive for the project. We fell out of regular communication with each other and didn’t follow along with our production plans we had made. In my opinion, I think this is in part to the idea we settled on, as I feel like no-one really clicked with the project and we just went with it so we could start work to avoid falling behind in terms of time. Another aspect that I feel affected our project was the ongoing pandemic currently taking place. It forced us out of college and disrupted our regular college lessons and in person communication, which really affected my team. We needed to rely on using Teams at home for communication, using a chat that we made for the project. However not everyone had Teams at home and wasn’t able to engage in college work like they could on site, which didn’t help our case either.
After a few weeks of feeling highly unmotivated for this project due to the idea itself and adjusting to the new normal that was isolation, I started to feel worried about this project and how it would negatively affect me if my team didn’t have a project to present. This was when I started thinking about the project idea as a whole and how we as a group didn’t really like the idea. Based on this, I decided to rally my teammates and together we could create a new idea we preferred so we could work on something using the time we had left. I created a Discord server for us to work in as this was an app that we all had at home and was easier for us to use. Using this server, we created a new idea and set up some simple pre-production and roles for the project. I have already discussed this in a different blog post, here. I discuss me becoming project lead, our plans going forward and show off the pre-production I rewrote for the new idea.
During this, I talked to my teammate Luke about the project, and he expressed to me his desire not to work on the project for personal reasons. I understood his reasoning and allowed him to not work on the project. After talking to my lecturer about everything however, he expressed that while Luke didn’t want to work on the project, we should’t write him out of the project entirely. I took this advice and decided to assign some smaller tasks to Luke that would allow him to work comfortably while not affecting the project too much if these tasks were not completed. This worked out for the best, as a few days later Luke contacted me about wanting to rejoin the project. Due to the previous advice from my lecturer, this was an easy process overall.
I took initiative and contacted our lectures about this change of project, and then progress began on our new idea. It started off well, we were communicating with each other using Discord to keep updated on progress and to Scrum every once in a while. It was easier to use Discord as it was a personal app we were all familiar with and it enabled us to come together in group calls and to share our screens. We made slow but steady progress for this new project.
However, once again we ran into some problems due to communication and our situation. Like last time, we found it difficult to reach out to our teammates for progress updates and the like. Me and my teammate Sam were able to keep in steady contact due to personal connections, and we continued on the best we could with the project. I know personally that I started to feel unmotivated for the project again due to not being able to reach my other teammates and unsure if I could put in the work for a project I didn’t feel would reach the light of day. To help with this, I once again contacted my lecturer about the current situation and he reassured me that only the work I have completed will reflect on me and my teammates contributions will not affect me negatively. He said all i could do was try to contact them as I could not force them to help with the project. This really helped me gain back some motivation and a drive for this project, so both me and Sam devised a smaller scale plan we could complete together that would show off our skills while still allowing our teammates to contribute if they so chose to.
Then, a couple weeks before this project’s deadline, my team reached out to me on our Discord server with questions of work and when we needed to complete this project for. While happy that they have finally reached out again with work they have been completing, I began to feel worried that compiling their work together would be a larger task than I would be able to complete in the time remaining. I figured that the best course of action would be to allow my team to send me work they have completed, and to try and compile as much as possible while not overwhelming me and overshadowing the parts of the project I wanted to work on. This was a system that worked for me and allowed me to work in Unity like I wanted to, so this is how we continued forward.
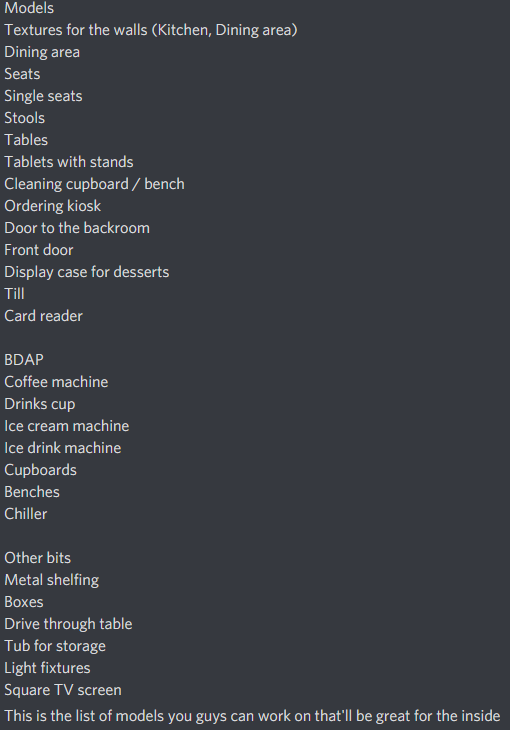
With our reduced time again to work on this project together, I thought it best to create a list of assets that would be beneficial for the project and my vision of it, and allow my team to choose from this list as they wished. This gave me control over what my team worked on overall, while also giving my team choice on what they wanted to complete from said list.
From here, we worked quite efficiently as a team. Using these guidelines and guidance from me, I allowed my team to work independently on what they choose to do and made sure I kept in constant contact with them. This worked out better for us all, and allowed us to pull something together as a team. We Scrummed a couple of times about what we could manage with this project and it helped keep us up to date. This wasn’t without trouble still, however not enough to completely hinder our progress.
Our Scrums from the last leg of the project – Scrum 11-05-20 Scrum 18-05-20 Scrum 25-05-20
For the last few weeks of the project, things went well and we managed to pull together a rough prototype of a game using assets, script and in engine work to produce something. While not completely happy with the state of the project as a final project for my next gen course, with everything that has happened during the course of this group work I am happy with the work me and my team managed to pull together in these circumstances. My biggest regret with this project personally is our communication issues and lack of leadership at the start. I feel like I could have done more to avoid these issues and my team could have produced something more to our standard of work. If I could do things differently, I would step up earlier as project leader and ensure that we never experienced a dip in communication between us, as this was our biggest downfall. Overall, I am happy with what I was able to accomplish despite these issues and plan to learn from this experience in future projects I complete.
Now that I feel like I have discussed everything surrounding the project, I plan now to delve into everything I completed for the project in engine and otherwise. Being the Unity worker, my main job is to build the project using the different assets me and my team have made. Other main areas I have been working on include menu scripting and design, area design and layout and UI design. I want to talk about my work in general, any problems I’ve had and how I worked to correct them if possible.
Building the project
So first things first, the project as a whole. Being the Unity worker, my task was to work with my team and build a game using their assets they have made and making sure everything worked together. This was the hardest part of the project for me due to problems previously discussed and time restraints due to this. I didn’t get the chance to properly develop the game as I should have, which is my biggest regret for the project. I had planned to include more as part of the project for the player to explore and do, however this never came into fruition. With this project as a whole, our main reoccurring problem was our reduced time frame limiting what we were able to complete and implement, as this also affected our ability to produce assets and problem solve anything we ran into.
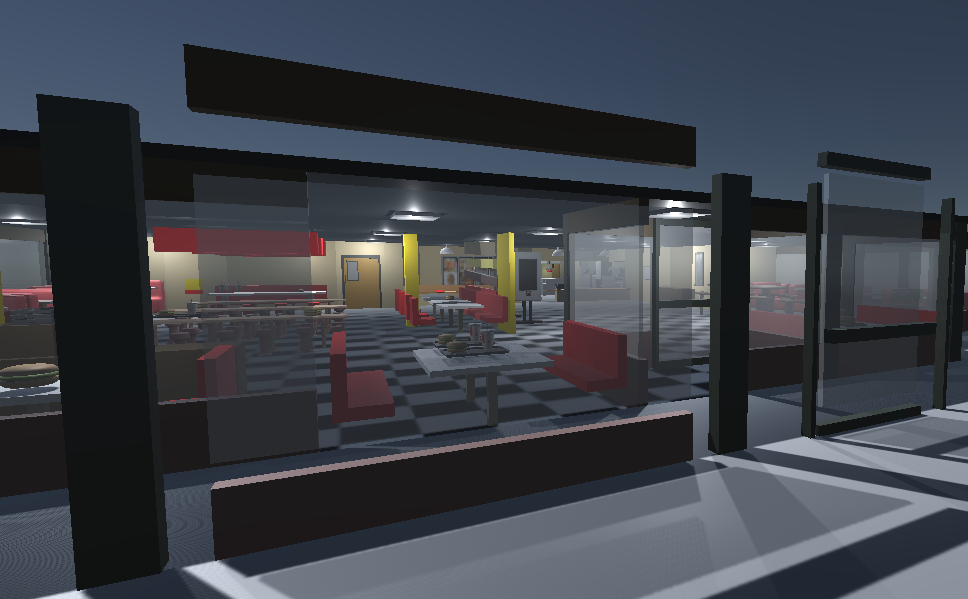
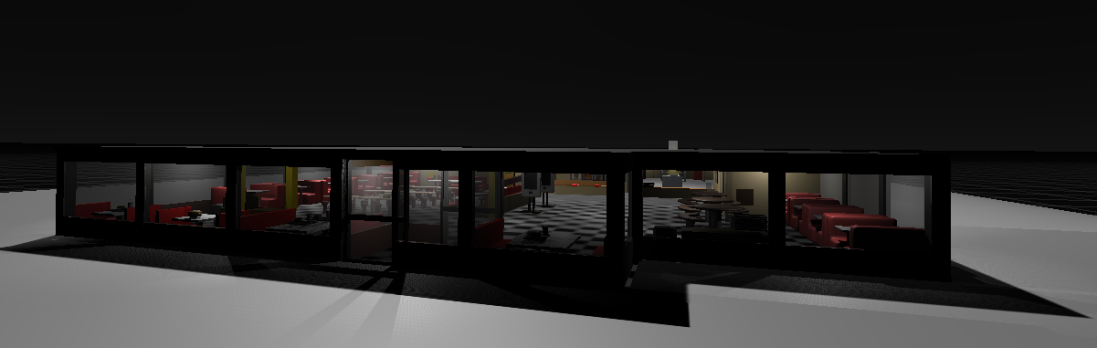
That being said, we overcame many challenges together as a group and managed to work together to produce a good look into what a fully realised idea could have been. While we don’t have an objective in this build of the game, I was able to create a believable rendition of a Mcdonalds restaurant using a mixture of team made assets, Unity tools such as cubes and materials, and texturing that help add detail to the environment.
Here is a video of the current build of the game. I recorded it myself using OBS, a free recording software. While recording this video, I had trouble with the software as it wouldn’t record my desktop audio or crop to the Unity window correctly. I couldn’t work out these issues due to time which led to a video that is lacking in a professional quality. Given more time, I could have fixed these issues and showcases our project in a much better light.
In it’s current state, I aimed to use this video to showcase whatever work I could that made it into the project. This includes things like assets, how the layout looks in engine and how certain coding works in the project.
I have also recorded a video of the menu assets I created in action, which showcases everything I included with them. I was able to record audio using a difficult method for it, as I wanted to fully show off everything I had included. This was taken in a built version of the game as some of my menu buttons would not work otherwise, such as the full screen toggle and quit buttons. However, when I built the project I ran into some issues due to differing resolutions to the normal Unity editor, such as menu assets being arranged differently. This is another issue I would like to have fixed but lacked the time to do so.
Overall, while our project is a little lacking in content and polish, I feel proud of what we have managed to accomplish with such difficult and rocky circumstances. With all of the problems me and my team faced, I am happy that we were able to pull together and accomplish so much in such a short time. While this outcome isn’t favourable, it has helped teach me some very important lessons when it comes to working in a team and learning to rely on others when you need to.
Layout
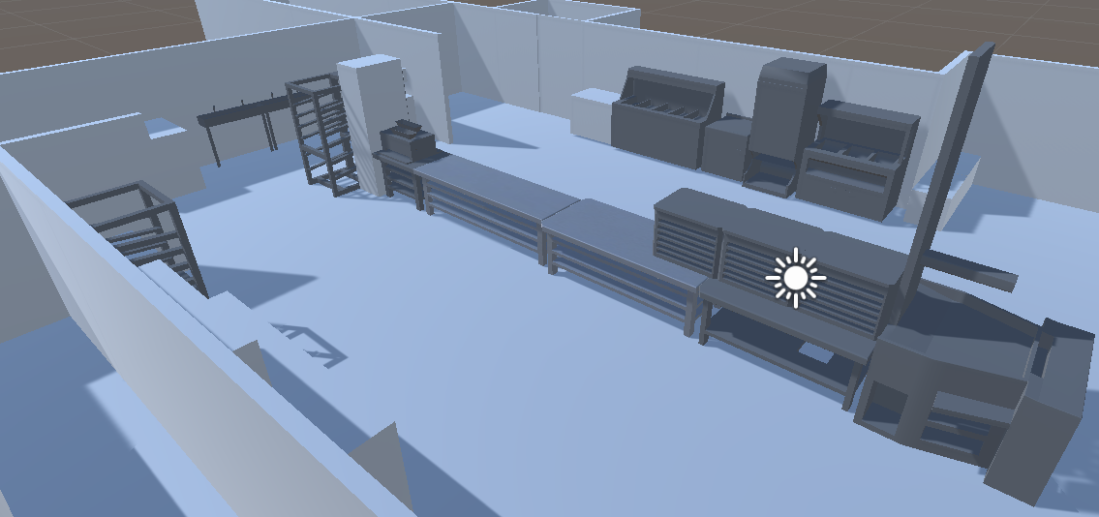
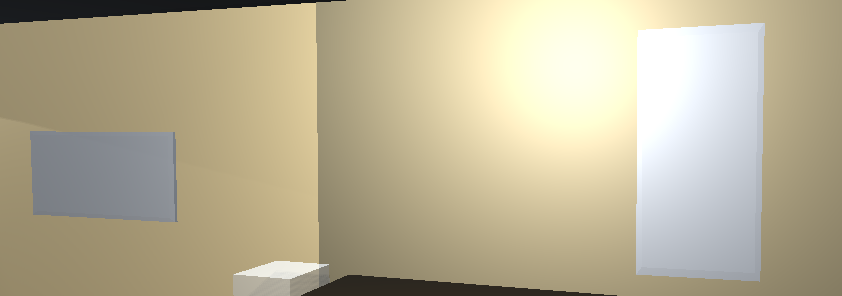
Working on the layout of the building has been the most fun but difficult part of the project. Since our idea is based inside of a Mcdonalds, I had an easier time as I could base it off a local Mcdonalds that I know and work at. This made getting the rough layout easy, however I still had trouble getting the fine details of the layout down and making the scaling of everything realistic.
When it came to building, I started with the walls of the place as a rough base for the layout. I wanted to build the building with scale in mind so everything had proper space to be believable as a restaurant and as a game environment too. Since our idea was based on creating mischief in the kitchen of the Mcdonalds, I needed to give the player enough room to move around and interact with the environment. This idea lead me to constantly tweaking how I placed the walls and how much room the player and objects would have in any given area.

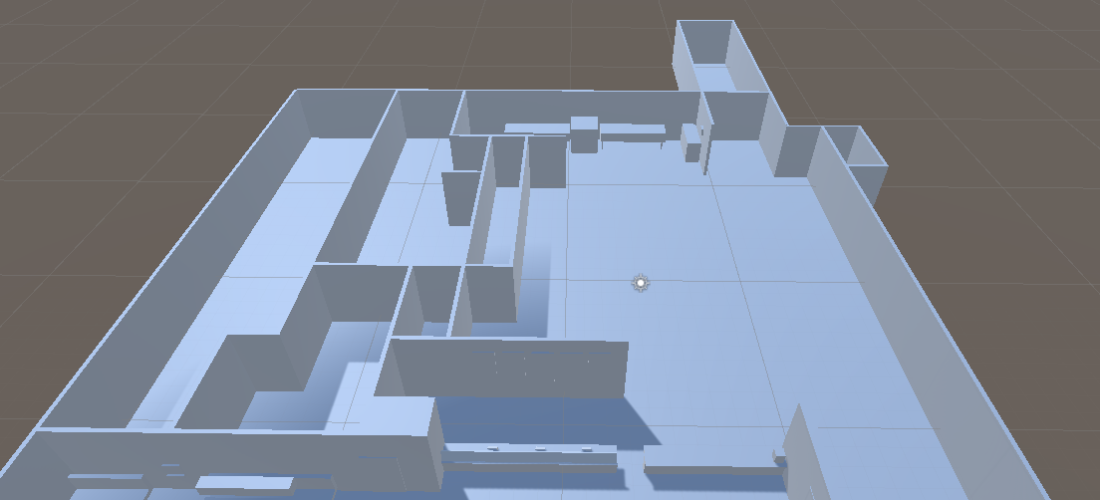
After much tweaking and inserting different assets, this is what the main outer walls ended up looking like. I was conscious of how much space i gave the different areas being the dining area, the kitchen and then the side area for employees. My main goal with the layout was to get it as close as possible to the location I work in, using memory and some reference images i manages to find and i feel like i have accomplished this well.
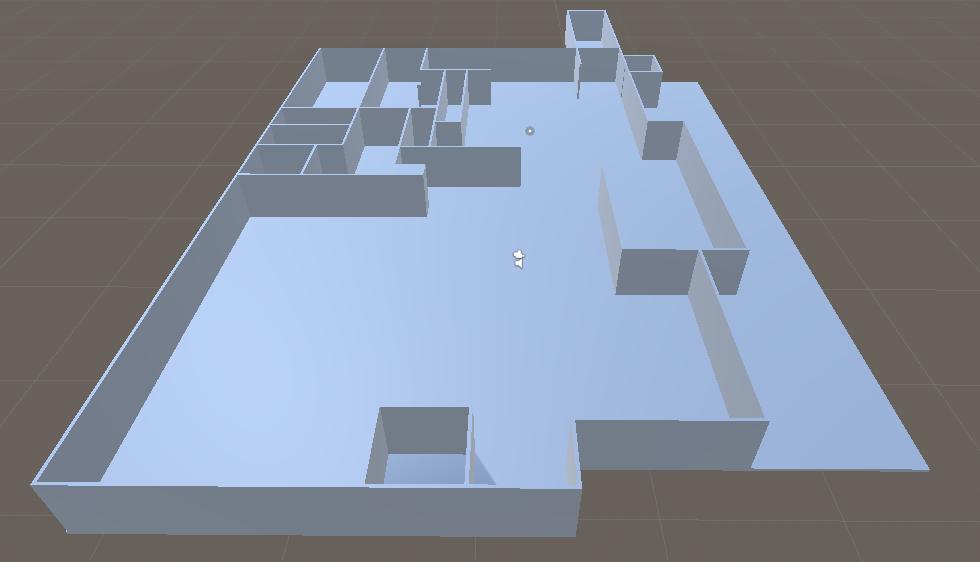
Here is the layout with the extra walls I needed to add in. This includes dividing walls for the side employee area, the front door and other such walls. Doing this helped with the layout of assets and areas, as the walls gave me an idea of where different areas started, ended and overlapped with each other.
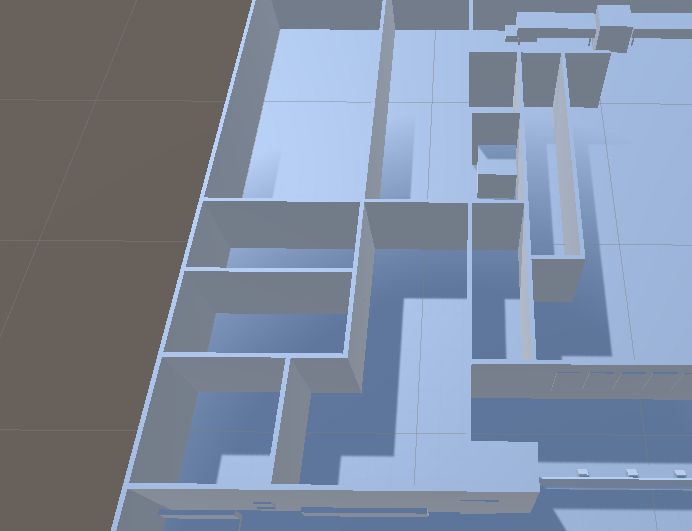
A closer look at the side area walls. I had planned to block out and use this area in game for different ways to cause mischief, however we decided not to include it due to timing issues.
After completing the walls, I started to work on filling the areas with blocks and other objects so I could more easily visualise the layout when I receive models from my teammates and just change out my blockout models with their versions of them. I started with the dining area as i could remember this area the best and it was easiest to find reference images for.
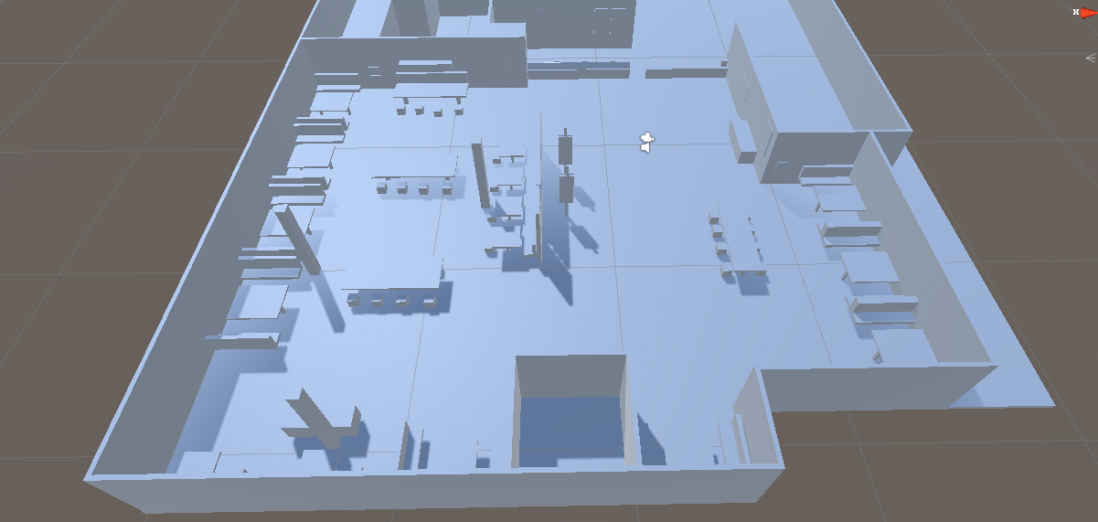
I wanted to get the layout and scale right with the real models, so I created and scaled basic cubes from Unity into these shapes for easier visualisation.


And a closer look at the Unity models. These didn’t take that long to create using the Unity engine, but they helped me a ton with model placement and visualisation. This is the method I used in other areas also. Using this method made implementation of replacement models way easier and helped save time for me down the line. For many models, all I needed to do was disable these Unity assets and replace them with their modelled counterpart.
After laying out the dining area, I moved onto the kitchen and it’s layout. This was a bit easier in terms of design, however I struggled to find reference images for the area.
This is how the kitchen area started out. I had added the extra walls at this point so placing the blocks was easier in relation to everything else.
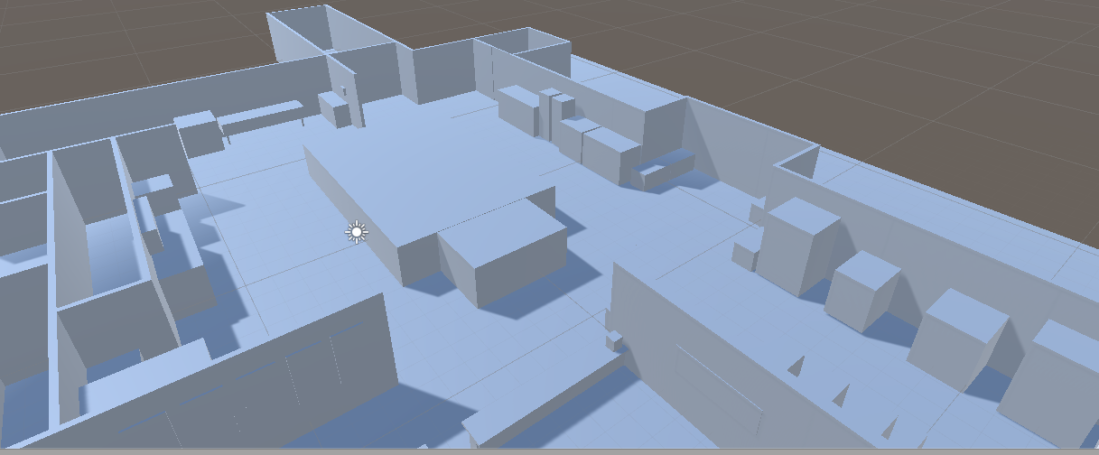
With this layout, I was able to get everything set out and placed where I wanted. This helped make it easy to implement models when I needed to.
Sam’s Models
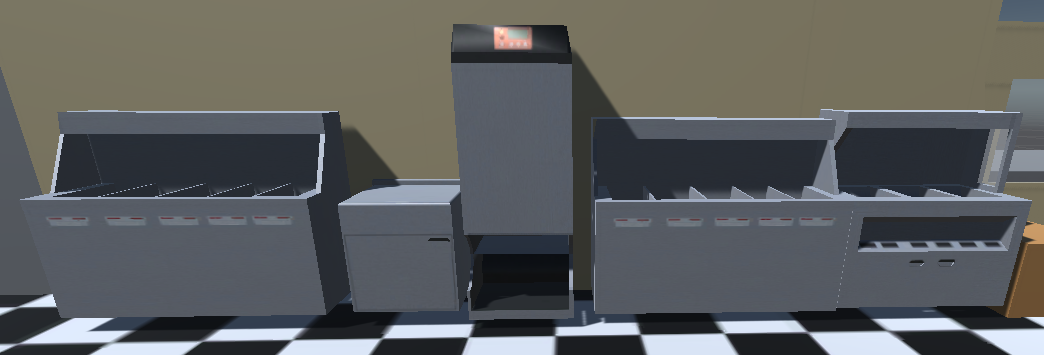
With this, the main layout and design was completed. I am happy with the overall design and how everything looked. However I am more than happy to tweak and change anything later if needs be. From here, I started to implement the models Sam had sent me for the kitchen. This was a relatively easy process, with only a small hiccup or two when putting the models in the scene. When brought into Unity, their scale was too big and their orientation upside down. These were easy problems to fix, all available in Unity. For the Scale issue, I was able to adjust the import settings of the model to scale it down before placing it in the scene. This has to do with how Unity handles outside assets, as Sam built these models in metres in Maya, making them too big for Unity while centimetres made them too small, as seen later on. For the wrong orientation problem, this was as easy as rotating them in engine.


After fixing these issues, everything else was smooth sailing. I easily replaced my pre-made placements with Sam’s models, adjusting the size to fit the scene. Here they are without textures, as I hadn’t received them yet.
With these added models, the areas I designed look great and I’m happy with what I’ve managed to do with these models. I textured these when I received the textures from Sam.
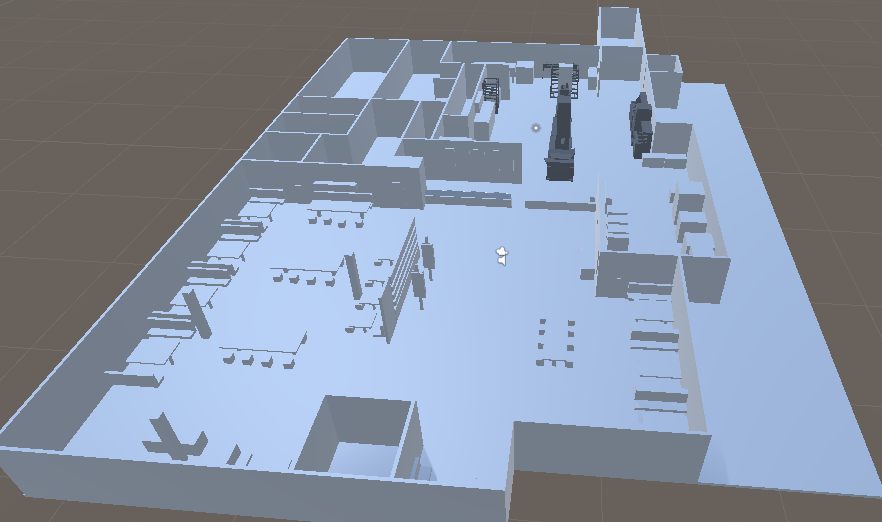
From here on out, all of these screenshots and videos will be from the final version of the game as when working on the project I went forth with progress and didn’t screenshot as I went. As a Unity worker, I find it difficult to properly document everything I have worked on in engine, however I want to give an in-depth look at how I built this project up. I plan to regress the scene as much as possible to explain my progress where possible.
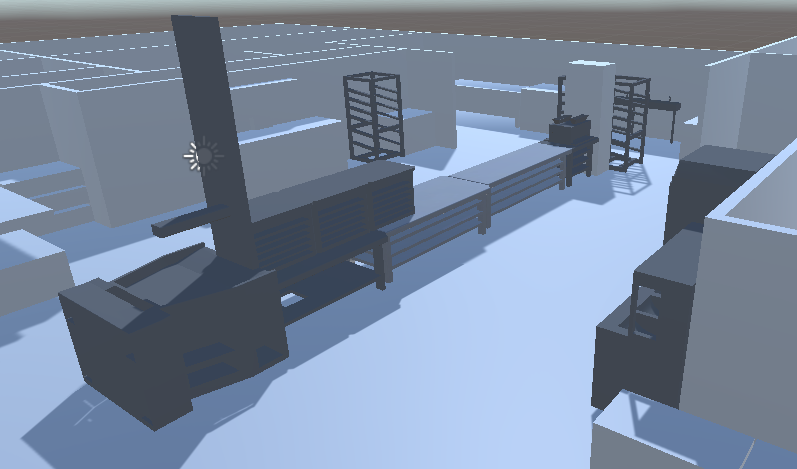
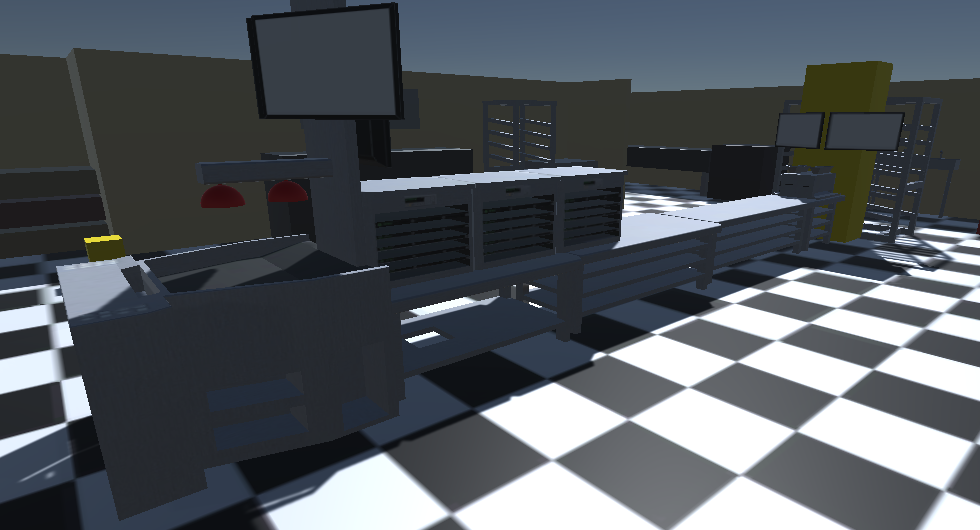
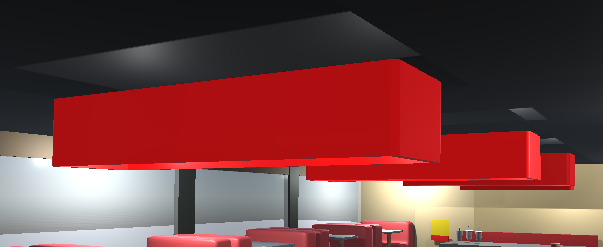
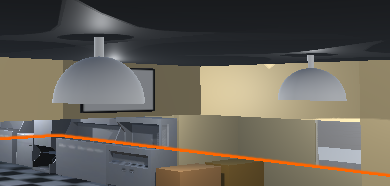
After receiving the textures from Sam, I applied them all to make sure everything worked and looked good. Using some extra models received later on, I added some extra flair such as lights on the OAT and TV screens in places typical for a normal Mcdonalds. These really helped make these models believable and more natural in this settings, and I am happy with how they help the scene come together.
These were the main models that Sam made for the project. A little while later I asked Sam for a couple extra models, as these would help to flesh out the area. I asked for two different light fixtures, a long rectangle one and a circular one, and also a food tray to place food models Callum had made. Since Sam had completed his main models, he was happy to help and completed these easily.

Since these were simple models, I told Sam not to unwrap these and that I would texture these in Unity using a material. This is an easy process as I just need to create a material, choose a colour and apply this to the asset. This helps save time as this can be applied to many different assets and doesn’t require any unwrapping, making it perfect for simpler models.
From this, I started asking Sam about any other models he may have lying around that could be easily implemented to help with the scene. He happened to find a bin model and a TV model. These both worked great in the scene, and the TV model also came unwrapped so I asked for the UVs also. Using these UVs, I created 4 different textures for this model for different places in the scene. I created these in Photoshop, using images I grabbed from online.

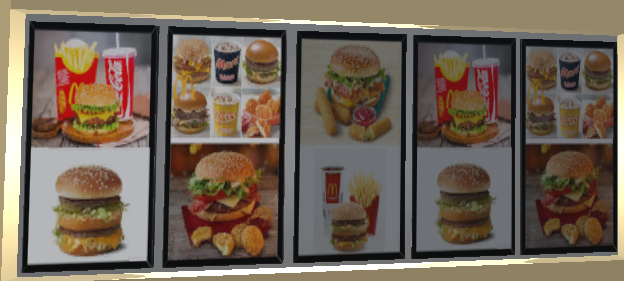

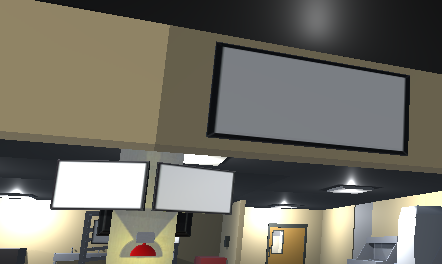
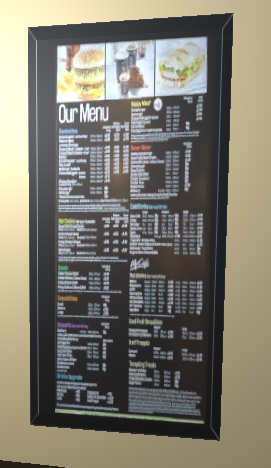

This was an easy and surefire way to make the world look more realistic with the menu texture and showing off the food behind the tills. I originally wanted the usual signs they have behind the tills, and even considered placing videos over the TVs to help immerse the player, however I was unable to find clear recordings of these screens.
While talking with Sam about models, we discussed using some more of Sam’s already made models to add on the office area I originally wanted to include. We made the decision to include it, and I started work on the area including creating a door for the room.
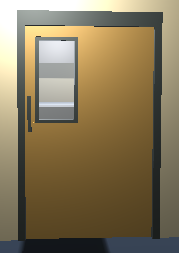
This door was made entirely in Unity, where I used various sized cubes together to create a door frame and door, with more materials used for colour and to create the window effect.

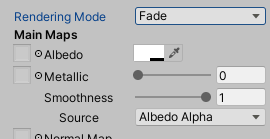
This clear effect was made for various different windows I created for the project, and was fairly simple to create. Using the Unity editor, I created a material, adjusted it’s rendering mode so it would be affected by any opacity changes, and lowered to make it slightly see through. This creates a believable window material with minimal effort.
Furthering the office area was easily done, as I had already mapped out the area in the blockout. I created a simple blockout using cubes that would be replaced by models, the same as the rest of the layout.

However, after discussing it further with Sam afterwards, we decided it best to not complete the office as it would add extra work onto our workloads and we chose to focus on different aspects of the project instead.
Callum’s models
Callum was in charge of our player character first and foremost. He created this character and textured it, with our plan to have a 3rd person camera to show off his model and animations. Here is our planned 3D camera and Callum’s character in engine.
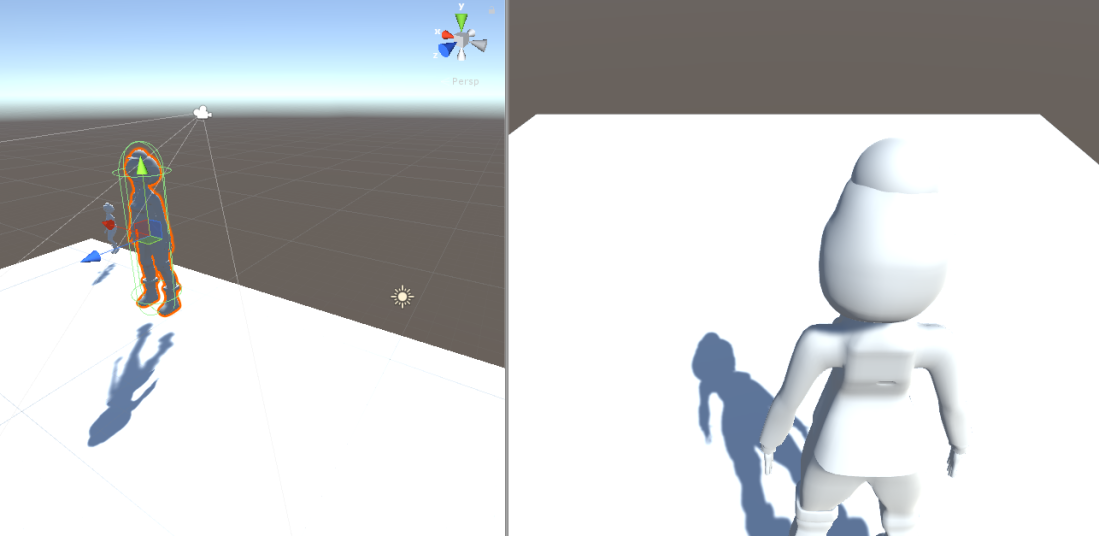
When placing this character in engine, I ran into a similar problem with scale as I had with Sam’s assets. However, the fix was the same as before and didn’t hinder my progress too much. One problem I did have with the character model came from how it came into Unity. When places in a scene, Unity separates it into the main part of the asset where I would place scripts and colliders, and into a ‘body’ component that is parented onto the main object.
This created a problem with the physics of the character, as I applied everything to the main component and disregarded this other component. Doing this however, causes the collision of the character to place them halfway into the floor as a result.

The only way I saw to fix this was to also add a capsule collider to the body component, as this was the actual body of the asset. Doing this made everything work together easily.

As we planned to have a 3D camera angle for the game, Callum had sent me animations for this character such as walking, picking up an object and crouching. However, the files for the animations would not work correctly in engine. I worked to fix the problem, using how I usually animate to try and get these animations to work. In the end, I was unfortunately unable to get these animations to work and we settled on a first person view, as this was also easier for the movement script to work.
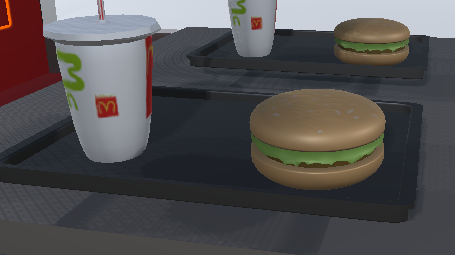
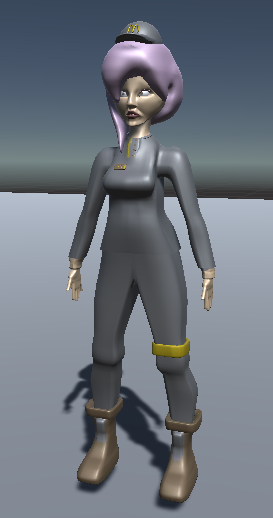
After this, Callum started to work on some models for the dining area, using the list I had sent previously as a base. This included things like 3 different tables, a burger and drink, ordering kiosk and bin. These all came with textures and I had no problems placing them in the scene and replacing my own models with them.


These models work great in the scene and really bring the area to life. While it was easy to change out my assets for Callum’s, some of his models didn’t fit into my layout. When this happened I had to either adjust the layout to accommodate or leave in my own models as they worked better. Doing this inspired me to colour said models to make them fit in with the textured models.


This design idea also expanded to the floor and the kitchen area as it didn’t look right having the modelled assets textured with everything else around them being a plain white.

Taking this idea further, I decided to create windows for the front of the restaurant using Unity materials and cubes like before. I also created the sliding doors we have too.

These windows were fairly easy to create, being composed of a few different cubes shaped and coloured differently. The main one being the window, created using the clear material I discussed earlier with the door sharing similar features.
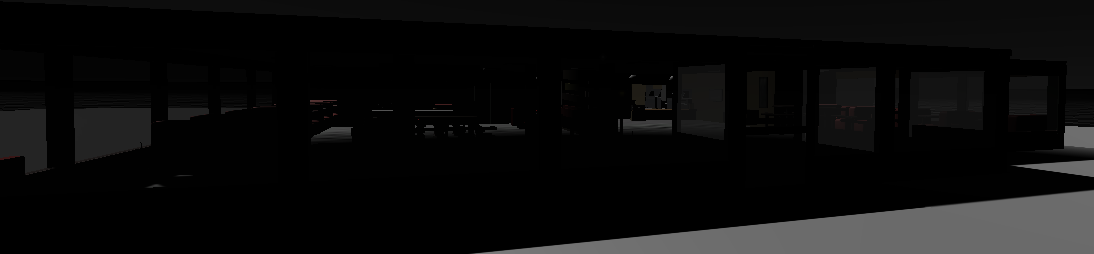
The next major thing I worked on in engine was lighting and the skybox. I haven’t previously worked with lighting in this way, and wanted to try and tackle it here. To create a need for lighting, I created a new skybox in engine and used it to dim the game world’s light, creating a night like setting. If given more time, I would have liked to work with the skybox asset more to see everything I could have done.
After creating this, I started to implement lighting inside the building as it appeared pretty dark without it.
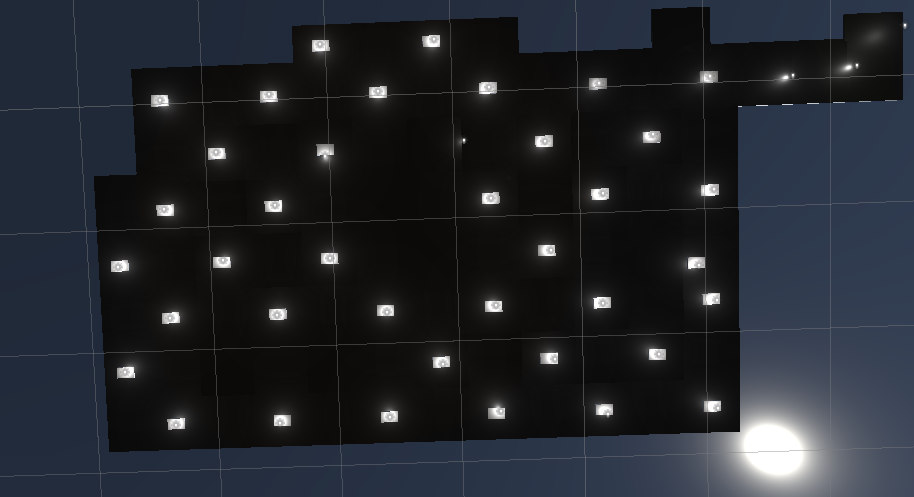
To create the lights, I started placing the light fixture assets Sam had created and adding in light sources from Unity, increasing the intensity to make sure the coverage was enough to light up everything.
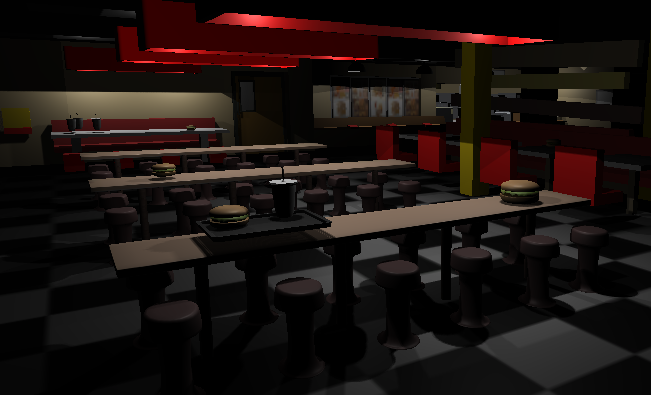
This was a good base to start from, as it created the desired lighting effect I wanted. From here, I disabled everything but the roof from the scene, selected every other tile, duplicated and shrunk down the tile to create equally spaced light fixtures. From here, I duplicated the original light source and manoeuvred the lights to match where the fixtures were placed. This was a good system as it was an effective way to create lighting and only required minimal changes to make them fit properly.
From here, I tried to add in some animations into the project to help make the world more interactive. These were simple animations created in Unity, using the assets in the scene. Unfortunately, I ran into the same problems I had with the character with getting animations to function in engine. I needed some extra script such as a on collision script that would trigger a light animation to turn them on like they are motion based, which would also have applied for the door animations. I was able to use one door animation as it opens when the player spawns into the area, but not much else.


These are simple animations that would have helped make the world feel more interact-able. If we didn’t have such time restrictions I would have been able to ask Ben or Luke to write it for me to enable me to implement these animations.
Work in engine also meant the implementation of the different scripts that were given to me by Ben and Luke. Ben handled the main character coding, while Luke would have handled the smaller world based coding. Implementing these was easy for me as long as everything worked on their end. For the most part, everything was smooth sailing. I had the assistance of Ben when implementing the movement script with the character, and the pickup script was as simple as applying the script to an object and directing it towards where it should appear picked up. Luke’s timer script also worked in an instant, requiring me to apply it to a text object and setting a time. The biggest problem we ran into was a lack of script to give the game an objective as we discussed in our new project pitch. This was unfortunately due to current times and an inability to work effectively. While I was able to build a scene regardless, I would have liked to have an objective to showcase in our video. This problem also affected our sounds, as I was only able to acquire a main menu track while being unable to receive any other sounds to help the world feel alive.
As we had problems with acquiring sounds for the project, I feel as if this really hurt the overall product we could have made. While adding in none-diegetic sound with the main menu music helps, having no diegetic sound in the scene really hurts the overall immersion in the game.
Overall, I feel like most of my time with this project was spent working in this scene to make it the bets I could within the time I had. From the basic blockout I ha created at the start to this fully realised environment, I’m very proud of what I was able to create with what I was given. This project really started to come together after I received the models from both Callum and Sam which gave me the motivation to fully immerse myself in this scene. While proud, I understand that this is far from the game we originally envisioned. Many factors went into this, and I’m thankful me and my team were able to pull together despite these challenges we faced.
Menu/UI Design and Implementation
The other main area of this project that I work on is UI/menu design and implementation. For me this is the part of the project I enjoy the most, as coding the menu is easy to understand and designing the menu and UI itself is entirely up to me. I started out practically with the menu, focusing on getting the elements of the menu working first and foremost. I created a few different buttons, a play button, options button, and a quit button. The play button will take the player into the game, the options button will open an options menu and the quit button will exit the application. The options menu contains a volume slider used to alter all audio in the game with the master audio slider I created, and a full screen toggle that will alter the application once I’ve built the project. As these buttons will only work in a built version of the game, I told the Unity editor to print the word ‘Quit’ when the button is pressed. This helps me test the menu in engine before I build the project.
This is an early video of the menu showcasing many of it’s functions and how the different buttons work. This is exactly how I want the menu to work, and the only thing I need to work on now is it’s design and adding in music to showcase the volume function.
The coding for the main menu was relatively easy, making great use of the inbuilt button system that Unity offers. I only needed to code in what I wanted the buttons to do once pressed, and this was as simple as ‘load the next scene’ or ‘quit the application’.
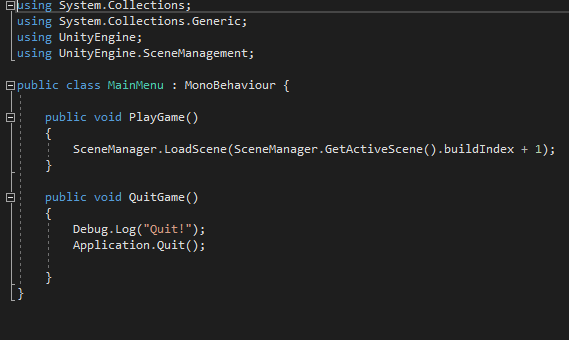
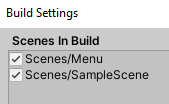
Using scene management in this code, I am able to tell Unity to load the next scene whenever the play button is pressed. This is done by adding 1 to the build index, a component that controls what scenes come after each other in engine. The quit button simply uses a built in function to quit the application once the button is pressed, which is what I tell the code to do here.
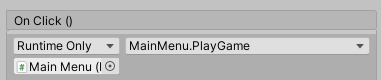
To make these buttons work once pressed, I needed to use the on click command in the Unity hierarchy to show the buttons what should be done once they are pressed.
Now leaves the options button. This was the simplest as it didn’t require any code to make work, simply just the on click commands. When this button is clicked, it will disable the main menu and enable the options menu. A simple button to create and use. The back button in the options menu uses the same principle, just in reverse.
From here, the options menu has 2 different options which i have previously mentioned. An audio slider and a full screen toggle. Both required a small amount of code which was easy enough to write and understand.
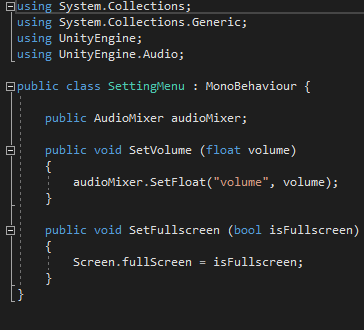
For the audio slider, I had to create a public float named volume that allows me to control the audio of the project using a master control slider I have created for this.
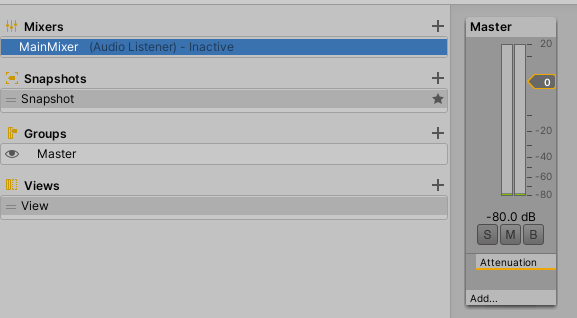
This enables me to use the slider to control the volume of the game, using a similar function to the on click command.

This tells the slider to adjust the volume whenever the slider is moved, creating our volume slider.
The toggle for full screen is similar to the quit button as it uses a built in function to check if the application is in full screen mode or not. It uses a bool function to check if the screen is true (in full screen mode) or false (not in full screen mode) with the toggle changing this bool based on player input.
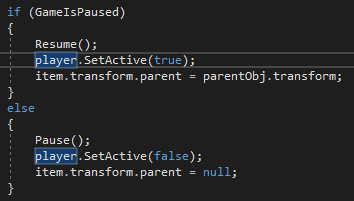
With the main menu functional, I started to work on a pause menu that would allow the player to pause the game. This was easy to implement as I could reuse the main menu buttons in this menu also. I wanted three main buttons, a resume button, a menu button and a quit button. These are all self explanatory, with the resume button continuing the game, menu button taking you back to the main menu and the quit button exiting the application. I also needed the game world to freeze while the pause menu is on screen.
Here is a video showcasing my pause menu when I first completed it. all of the buttons worked perfectly, using the same methods I did for the main menu. The main difference here is that once I press the escape button, the code sets time in engine to 0, meaning nothing can move and everything is stood still while also bringing up the pause menu. Pressing the escape button again will have the reverse effect, returning time back to normal and disabling the pause menu.


While this should have worked for everything in scene, I had problems with the camera still moving around when I brought up the pause menu, which wasn’t intended. I played around with a couple different solutions, but I ended up using a combination of different scripts. My plan was to disable the player character so that the camera couldn’t be moved while the pause menu is active. This worked for the most part as it disabled the player, while also disabling the main camera as it is attached to the player. To get around this, I borrowed a line of code from the pick up script that changes the status of parent game objects, as this was my problem. Using this, I told the code to un-parent the camera from the player before it disables it, meaning that the player still can’t move the camera while the camera remains active in the scene.
Here is a video of this in effect.
For the pause menu, I also added in a simple phasing animation that plays whenever the menu is brought up. This helps add some flair to the menu while being easy to accomplish, only requiring me to change the opacity of the background.
After getting my two menus to work, I decided to go back and work on the design of the main menu. My goal was to create a look that fits in with the Mcdonalds style while still remaining functional.
This is the design I decided on, usually with some red to cover the bottom left corner. I decided to use red, orange and yellow as these are colours normally associated with the Mcdonalds brand. These bright colours also help to make the menu stand out. I added in some simple animation to help the menu feel less static and bland, simply increasing and decreasing the size of assets at regular intervals.
Overall, I’m very pleased with how both menus turned out. I was able to implement everything I wanted to with them and design them based on the project. They function well and do everything they need to, with me being able to solve any issues I had relating to them.
Conclusion
This project was a bit of a roller coaster in terms of how it went. We had many high points and low points, however we managed to push through as a team. As previously mentioned, my team suffered from a lack of communication for various different reasons, some personal and some due to circumstance. However, we managed to push on and managed to complete something worthwhile even with our challenges. Unfortunately, we didn’t manage to complete our plans like we wanted. I feel like our scope was manageable and if we had better communication then it would have been easily achieved. Due to this, our projects lacks the mischief element that the brief was after. We had plans for how we would implement this, but these never came into fruition.
For me, the highlight of this project was when everything clicked into place for me with this new idea. The project was starting to look like something when I used Sam and Callum’s models in the scene, and this made me fully immerse myself and strive to make the project the best I could make it. For personal improvements, I wish that I had blogged more throughout this entire project. It would make it easier to show off my work in a cohesive timeline and cut out a lot of crunch time near the end of the project.
The best advice I could give to a first year would be to have constant communication between teammates as this can easily make or break any project. Make sure you have consistent ties to each other and are supporting them as much as possible. Your project will only be successful if you are aware of your team and how well you can work together. It’s a handy way to meet and get along with new people too.
